GuidesPublished 5 min read
Mechanism Animation: Showing Product Movements
Mechanism animation reveals how a technical product moves, changes pose and works with accessories by animating each motion from the clearest angle and adding concise on‑screen labels. This guide walks you through shot selection, callout design, common mistakes and the production steps from CAD to final video.

Key takeaways
- Mechanism animation focuses on each moving part, showing it from the angle that explains the motion best.
- Planning starts with listing all movements, positions and accessory interactions that need to be visible.
- On‑screen callouts should be short, use consistent styling and stay visible long enough to read.
- Avoid clutter, excessive camera speed and unlabeled motions that confuse the viewer.
- A smooth workflow follows brief, concept, production, review and delivery, using CAD files and material references.
Mechanism animation shows how a technical product moves, changes position and works with accessories by animating each motion from the clearest angle. This article explains how to plan shots, choose camera paths, use on‑screen callouts and avoid common mistakes when creating mechanism animations for products like surgical tables, robots or sensors.
What is mechanism animation?
A mechanism animation isolates each movement of a product — such as a tilt, a slide, a fold or the attachment of an accessory — and shows it from the angle that makes the motion easiest to understand. Unlike a general product reveal that focuses on appearance, a mechanism animation is about function. It answers the question “how does it work?” by letting the viewer see the moving parts in action.
Common uses include medical devices that adjust height or angle, industrial machines with moving arms, furniture that reconfigures, and consumer gadgets with detachable parts. The animation can run as a standalone clip or be part of a larger product video.
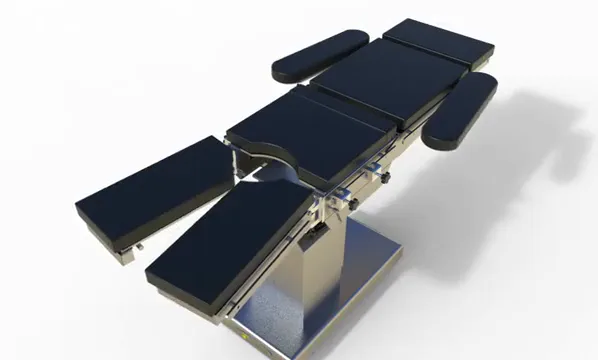
See the surgical operating table animation that walks through every tilt, section and accessory.
Why use mechanism animation for technical products?
Technical products often hide their value inside moving mechanisms. Photos or static renders cannot convey how a lever locks, how a platform tilts or how a sensor snaps into place. A mechanism animation makes these interactions visible.
Benefits include:
- Clarity for buyers who need to verify fit or function before purchase.
- Reduced need for lengthy text explanations or live demonstrations.
- Ability to show multiple configurations in a short time.
- Reusability of the same 3D model for stills, exploded views and social cuts.
Planning the shots: angles, movements and key positions
List every motion
Begin with a simple list of all movements the product performs in its intended use. For a surgical table this might be:
- Height adjustment
- Lateral tilt
- Trendelenburg and reverse Trendelenburg
- Section elevation (back, leg, foot)
- Attachment of side rails
- Adjustment of padded sections
Choose the primary axis
For each motion decide which axis explains it best. A vertical slide is clearest from a side view; a rotation is clearest from a top‑down or angled view that shows the arc. Write down the preferred camera direction next to each item on the list.
Show accessory interaction
If an accessory clicks onto a rail, plan a shot that captures the approach, the click and the locked state. Consider a close‑up that highlights the mating features while keeping enough context to see where it attaches.
Group similar motions
If several adjustments share the same motion type (e.g., all height adjustments use a linear actuator), you can show one representative example and note that the others work the same way. This keeps the animation short and avoids repetition.
Create a shot table
A simple table helps keep track:
| Motion | Best camera angle | Approx. duration | Callout text |
|---|---|---|---|
| Height increase | Side view, slightly low | 2 seconds | “Raise” |
| Lateral tilt | Front‑off‑axis, 30° | 2 seconds | “Tilt sideways” |
| Back section lift | Side view, focus on back | 2 seconds | “Lift back” |
| Side rail attach | Close‑up on rail‑to‑slot | 1.5 seconds | “Click rail” |
This table becomes the storyboard and guides the production team.
Using on‑screen callouts and labels
Keep text short
Use one or two words that describe the action, such as “Raise”, “Tilt”, “Lock” or “Attach”. Avoid full sentences unless absolutely necessary.
Consistent styling
Pick a sans‑serif font, a weight that remains legible at small sizes, and a colour that contrasts with the background but fits the brand palette. Apply the same style to every callout throughout the video.
Placement and leader lines
Position the callout near the moving part. If the part is small or the area is crowded, add a thin leader line that points to the feature. Keep the line subtle — usually a 1‑pixel stroke in the same colour as the text.
Timing
Fade the callout in as the motion starts, hold it for at least one second after the motion ends, then fade out. This gives viewers time to read without feeling rushed.
Avoid clutter
Limit the number of simultaneous callouts to two or three. If many features appear at once, stagger them or use a brief pause between groups.
Common mistakes and how to avoid them
Unclear angles
Choosing a camera angle that hides the motion (e.g., viewing a vertical slide from directly above) makes the animation useless. Always verify that the direction of movement is visible in the preview.
Excessive speed
Moving the camera or the product too fast prevents the eye from following the action. Use ease‑in/ease‑out curves and keep the primary motion visible for at least one second.
Missing context
Showing only a close‑up of a latch without indicating where it sits on the product can confuse viewers. Include a quick establishing shot or a semi‑transparent overlay that situates the detail.
Inconsistent labeling
Changing font, colour or style between callouts forces the viewer to relearn the convention. Stick to one style guide.
Overloading the timeline
Trying to show every tiny adjustment makes the video feel like a checklist. Prioritize the motions that differentiate the product or answer the most frequent customer questions.
From CAD to final animation: workflow tips
Prepare the CAD file
Export the model in a neutral format such as STEP or IGES. Clean up hidden geometry, merge duplicate vertices and ensure that moving parts are separate components. A well‑organized file speeds up the preparation step; see our guide on preparing CAD files for more detail.
Define materials and lighting early
Assign provisional materials that match the final look (e.g., matte white for the frame, soft gray for padding). Set up a neutral lighting rig that will not cast distracting shadows during motion tests.
Block the animation
Create a simple version with only camera moves and placeholder textures. This lets you verify shot timing and callout placement before investing in high‑quality rendering.
Add details and callouts
Once the block is approved, apply final materials, refine lighting and insert the on‑screen text. Render a low‑resolution preview to check legibility.
Review and iterate
Share the preview with stakeholders, collect feedback on clarity and timing, and adjust the animation. Revision rounds are built into the schedule, so expect a few cycles.
Export deliverables
Render the master version in 16:9 for the website and YouTube. Then generate 9:16, 1:1 and 4:5 cuts for social media. Export still renders at key frames for use in product pages or presentations.
Conclusion
Mechanism animation turns hidden motion into clear visual information. By planning each shot, using concise callouts and avoiding common pitfalls, you can show exactly how a technical product works, builds confidence and supports sales conversations.
If you have a product with moving parts that need explaining, explore the 3D product animation service or start a project with a short brief.