GuidesPublished 5 min read
Exploded View Animation: When and Why to Use It
An exploded view animation separates a product into its parts to reveal internal structure and assembly order. This guide explains when to use it, the planning steps, animation process, and pitfalls to watch for.

Key takeaways
- Exploded view animations are ideal for products with hidden components or complex assembly.
- Start with a clean CAD model and decide the separation order that tells the clearest story.
- Use consistent spacing, timing, and lighting to keep the explosion readable and elegant.
- Avoid over‑exploding parts or adding unnecessary motion that distracts from the core message.
- Link the animation to other assets like still renders and social cuts for maximum reuse.
An exploded view animation separates a product into its parts in a clear sequence to reveal internal structure, assembly order, and build quality.
This article explains what an exploded view is, which products benefit most, how to plan and animate it, and common pitfalls to avoid. You will learn the practical steps from brief to delivery and see how to integrate the animation into a broader marketing toolkit.
What is an exploded view animation?
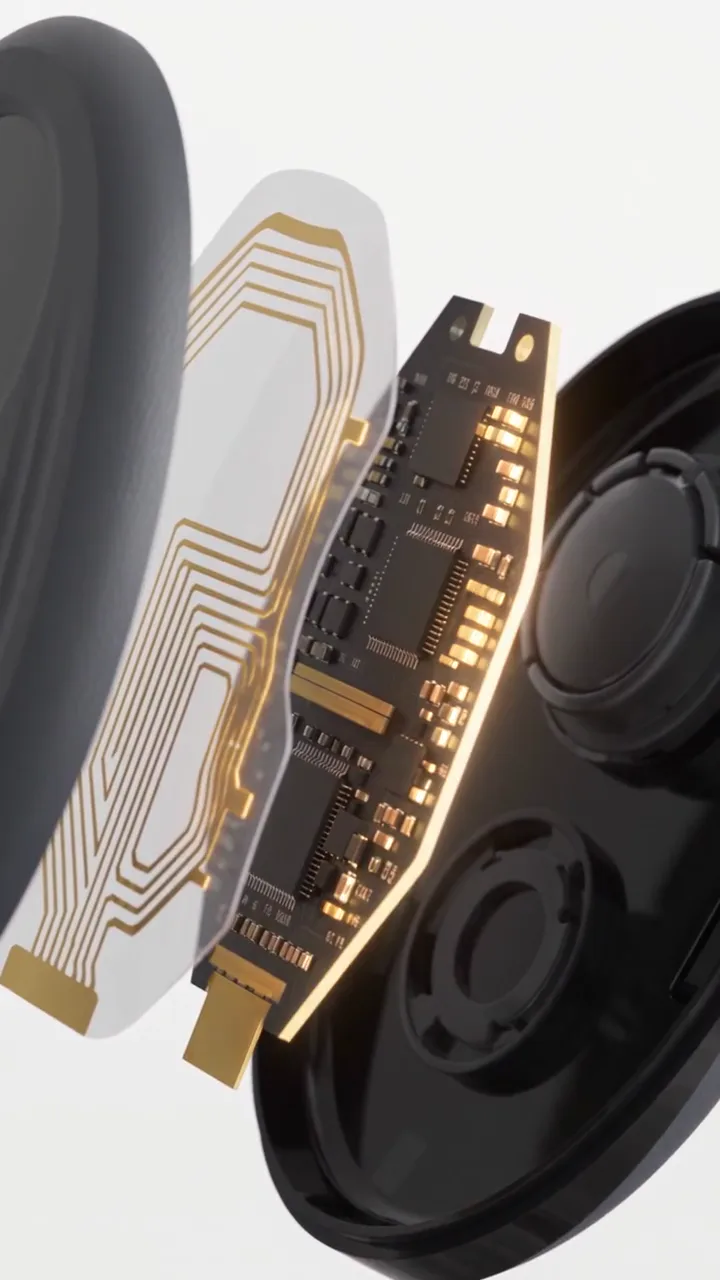
An exploded view animation takes a 3D model of a product and moves its components away from each other along predefined axes. The motion is usually smooth and symmetrical, showing each part in relation to the others before they come back together. Unlike a simple rotation, the explosion highlights what is inside the shell, how parts fit, and what fasteners or connectors are used. You can see the technique in the smart sensor exploded view project, which opens a compact device layer by layer.
The technique originates from technical illustrations used in manuals, but in 3D it adds timing, lighting, and camera movement that make the sequence engaging. A well‑done explosion can be completed in a few seconds yet leave a lasting impression of engineering quality.
Which products suit an exploded view?
Products with hidden technology or layered construction are natural candidates. Examples include:
- Electronic devices such as sensors, wearables, and smartphones where the PCB, battery, and display are inside a casing.
- Mechanical assemblies like gearboxes, pumps, or valves where showing the interaction of gears, seals, and housings explains function.
- Medical instruments that contain disposable cartridges, sensors, or fluid paths.
- Consumer appliances where the motor, heating element, or control board adds value to the story.
If the product’s main selling point is its outward appearance only, an exploded view may add little value. In those cases a product reveal or lifestyle render might be more effective. For a broader overview of formats, read what 3D product animation is.
How to plan the explosion sequence
Planning starts with the story you want to tell. Ask:
- Which components are most important to show?
- What order reflects real assembly or disassembly?
- Should any parts stay grouped (e.g., a flex‑cable with its connector)?
- How much separation is needed to see details without losing context?
Create a simple storyboard or a list of key frames. For each frame note which parts move, the direction and distance of the move, and any timing holds. Keep the motion consistent: if you move the housing upward, move the internal boards downward by the same amount so the centre of mass stays stable.
It helps to work directly in the 3D software with null objects or empty groups that drive the movement of each component set. This makes it easy to adjust timing later without breaking the model.
From CAD to animated explosion
Once the brief and concept are approved, production follows these steps:
- Model preparation – Import the CAD file (STEP, IGES, SolidWorks, etc.). Clean up unnecessary geometry, merge duplicate vertices, and ensure each moving part is a separate object.
- Material assignment – Apply realistic plastics, metals, glass, or finishes based on Pantone, RAL, or HEX references. Keep the material library organized so changes can be made quickly.
- Lighting and environment – Choose a neutral studio lighting setup that avoids harsh reflections unless a specific mood is required. A simple gradient backdrop often works best for technical clarity.
- Animation blocking – Set up the explosion using the null‑object method. Block the timing: typically 0.5‑1 second for the initial separation, a hold of 0.3‑0.5 seconds to view the parts, then 0.5‑1 second for the reassembly.
- Camera moves – Decide whether the camera will stay static, dolly in as the parts separate, or orbit around the exploding model. A slow dolly‑in adds depth without distracting from the parts.
- Rendering – Render frames at the required resolution (up to 4K) and bit depth. Use denoising and motion blur sparingly; for technical clarity a clean image is preferable.
- Compositing – Add any UI screens, labels, or call‑outs. Colour‑correct to match brand guidelines and export the final MP4 in the needed aspect ratios (16:9, 9:16, 1:1, 4:5).
Because the model is already textured and lit, creating social‑media cuts or still renders from the same scene is a straightforward extra step.
Common mistakes to avoid
- Illogical separation order – Moving parts in a way that does not reflect how they are taken apart confuses viewers and can imply incorrect assembly.
- Excessive distance – Spreading components too far apart makes the product unrecognizable and wastes render time.
- Unnecessary secondary motion – Adding random spins, wobbles, or bouncing to parts creates a cartoonish feel that undermines the technical message.
- Inconsistent timing – Starting some parts early and others late without a clear reason makes the explosion look uneven.
- Over‑labeling – Too many text call‑outs or arrows clutter the view; keep annotations minimal and timed to appear when the relevant part is in focus.
- Ignoring scale – If the product is very small (e.g., a sensor) ensure the explosion is still visible at the final output size; consider a slight scale‑up of internal parts for clarity.
Avoiding these pitfalls keeps the animation focused on communicating build quality and engineering thought.
Integrating exploded views into a wider campaign
An exploded view animation rarely stands alone. It works best when paired with:
- Hero product reveal – Use the explosion as a middle section of a launch film that starts with a close‑up of the exterior and ends with the product in use — like the X-ray pass in the autonomous cleaning robot film.
- Feature cuts – Isolate a single component (e.g., the flexible circuit) and create a short 9:16 clip for social media that highlights its material or function.
- Still renders – Export high‑resolution images of the exploded state for use in datasheets, white papers, or trade‑show boards.
- Product-page clips – Short loops of the explosion work well next to the feature they explain on your product page.
By reusing the model and animation assets you maximize return on investment while keeping visual language consistent across channels.
Conclusion
Exploded view animation is a powerful way to show what is normally hidden inside a product. It works best for devices with internal electronics, mechanical layers, or complex assemblies where revealing the build adds credibility. Planning a logical separation sequence, keeping motion clean and consistent, and avoiding over‑explosion or unnecessary secondary motion are key to a successful result.
If you have a product that would benefit from an internal view, explore the 3D product animation service or start a project with a brief that includes your CAD files, material references, and the key features you want to highlight.